
In this post, I will go over the steps on how to deploy the Let’s Encrypt Certificate on your TrueNAS CORE with ACME Client.
➡️ If you think this tutorial is helpful, please support my channel by subscribing to my YouTube channel or by using the Amazon/eBay/ClouDNS Affiliated links below (Full Disclaimer). I will get a small commission from your purchase to grow my channel:
🚀 ClouDNS Affiliated: https://www.cloudns.net/aff/id/255803/
🚀 Things I used for my server: https://amzn.to/3hudohP
🚀 Tools I used: https://amzn.to/3uXaSUr
🚀 Devices I used: https://amzn.to/3FYlfxk
🚀 Networking/Cybersecurity/Programming Books: https://amzn.to/3HEYwb0
🚀 TrueNAS HBA SAS controller IT Mode from the Art of Server: https://ebay.us/cBWEvJ
🧧 PayPal Donation: https://www.paypal.com/paypalme/sysadmin102
If you don’t like reading posts like I do, you can follow along on my Youtube Channel. Below is the video:
➡️ Introduction
The generally recommended deployment method is to run acme.sh on the TrueNAS server itself via the built-in cron facility, using the DNS API mode to authenticate to LetsEncrypt. Almost all TrueNAS servers are not (and should not be) exposed directly to the Internet, so authenticating to LetsEncrypt via the HTTP-01 challenge type is usually not feasible.
(The locked-down nature of the TrueNAS web interface also makes it difficult. While it is possible to set a non-standard HTTP port for the web interface, you would still need to set up an additional HTTP server daemon (preferably in a jail) and redirect port 80 to your new HTTP daemon. You will also need to add the non-standard port number to the end of the DEPLOY_TRUENAS_HOSTNAME value. Since most DNS providers now have APIs this is a lot of unnecessary custom work that can be avoided by just using the DNS API approach.)
➡️ Step 1: Enable SSH Service with Allow Login as Root with Password.
You have the option to skip this step if you want to utilize the built-in Shell within TrueNAS GUI. However, I personally prefer using Terminal or Command Prompt as it retains the history of the session until you close the windows. It’s easier to figure out what you did and what mistake you made by reviewing the history. Shell is useful for quick commands. However, Shell will reset if TrueNAS web GUI is reset. The option is yours, so choose wisely :).
SSH on Terminal/Command Prompt option:
- Navigate to Services.
- Toggle SSH service to start SSH service.
- Select the pencil icon to edit the Options.
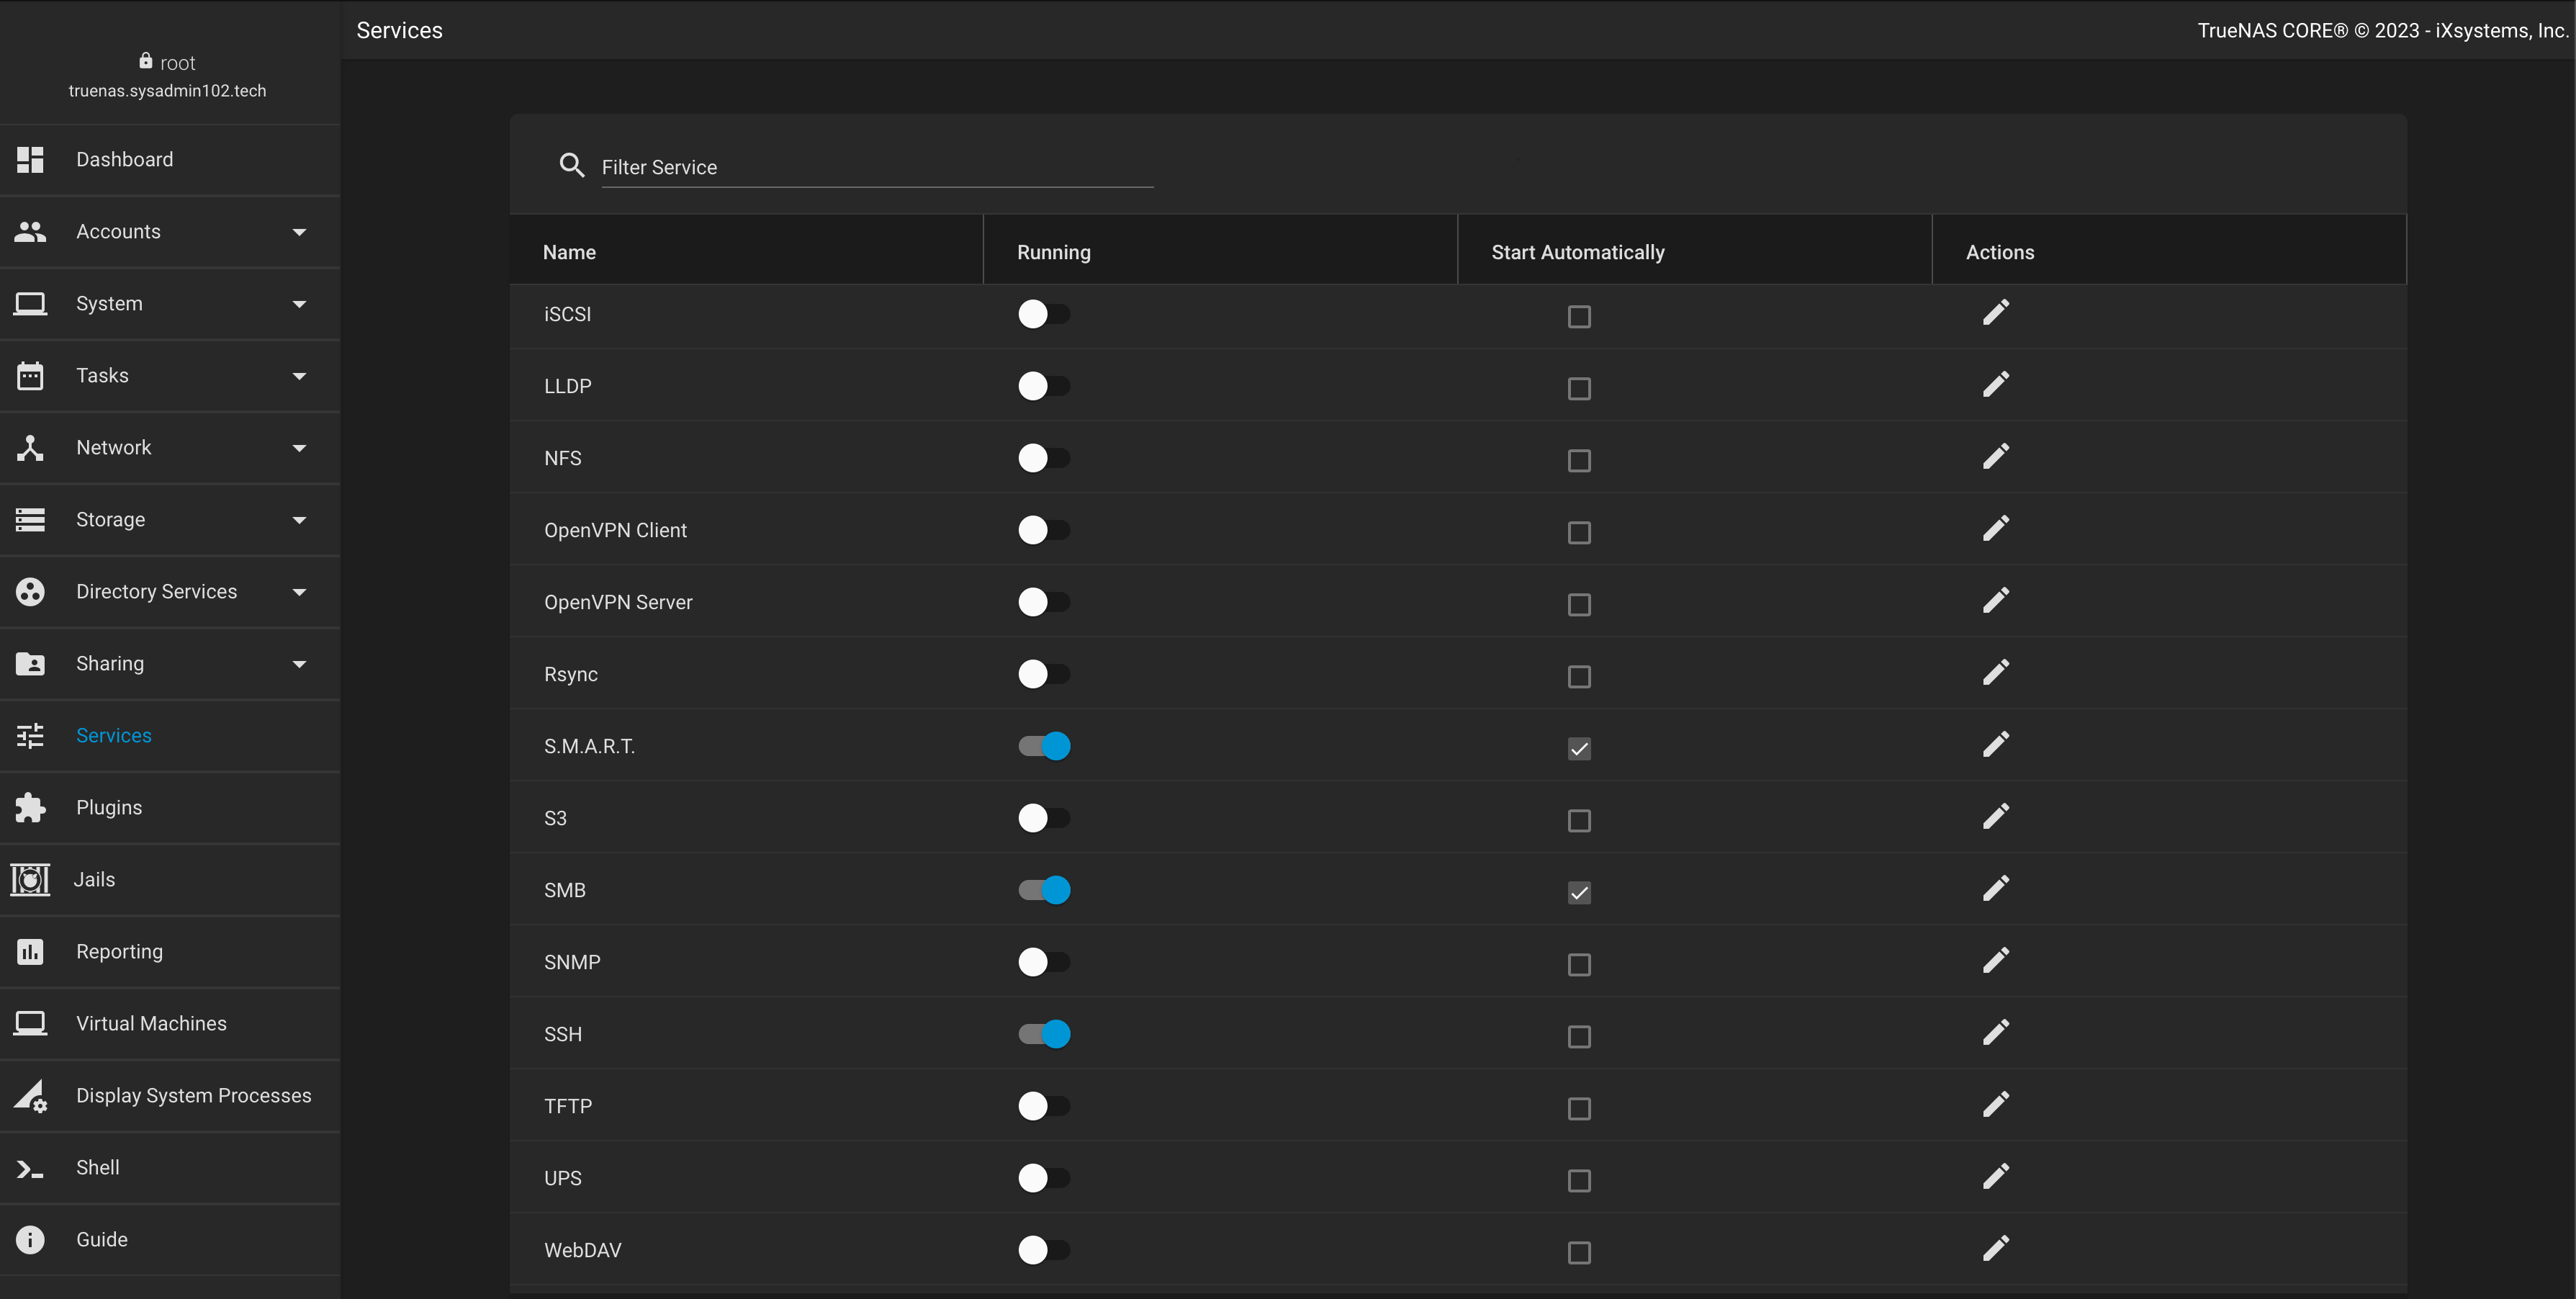
- Select Login as Root with Password. (Not recommended to leave this option ON. This is a quick and cutting corner way for me to use SSH. I leave SSH service off by default).

If you want to learn more about using SSH on TrueNAS (the video is for the good old FreeNAS, but it works the same on TrueNAS), watch the below video:
Shell Options
- Not my favorite choice, but if you just want to copy and paste the CLI from this post, then by all mean, use it.
- Lastly, if you already know what you doing, you wouldn’t be reading my post right? 🙂 So let not debating on this subject. The choice is yours. Sorry, I’m being sarcastic! But in fact, many have commented on my channel or emailed me asking why I don’t use Shell.


➡️ Step 2: Create a DNS API user.
I used Cloudns, so the below instruction is for Cloudns.net. You need to set the HTTP API user ID and password credentials. See https://www.cloudns.net/wiki/article/42/.
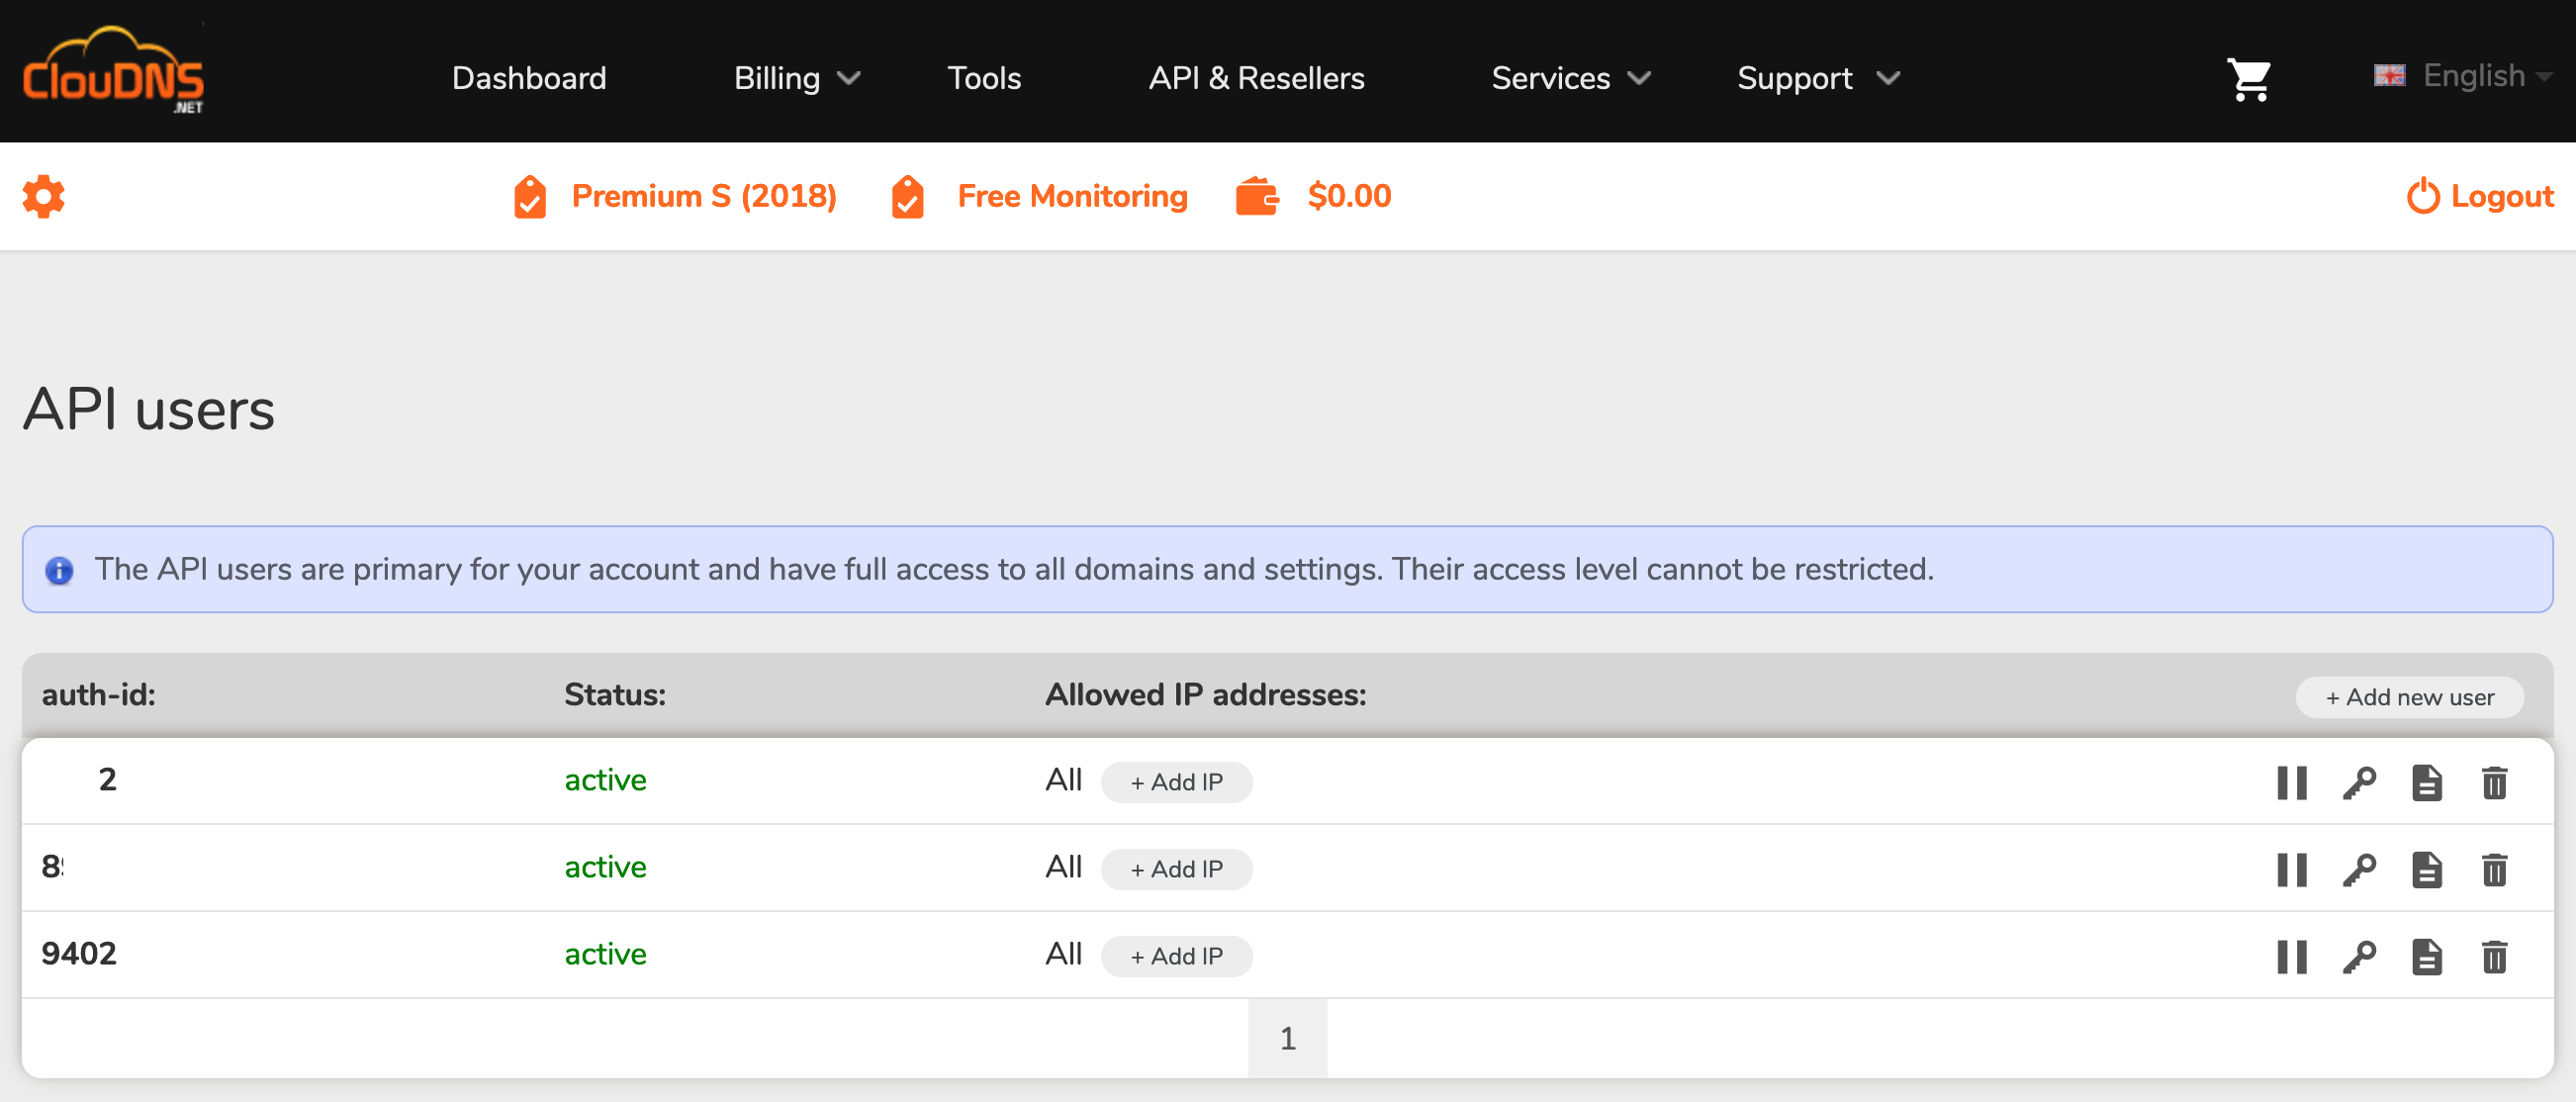
- Login.
- Select
API & Reseller. - Select
+ Addnew user. - Auth-ID will be automatically assigned.
- Enter your
SUPER STRONG PASSWORD. - Save.
- Keep the credential handy because you will need it in the next step.
➡️ Step 3: Adding Cloudns credential to root/.acme.sh/account.conf file.
Depending on your DNS service, you will need to do some homework on what variables need to be set for your DNS. You can easily get this info from acmesh offical wiki:
https://github.com/acmesh-official/acme.sh/wiki/dnsapiBelow are the variables require for Cloudns.net API:
# Use this for a sub auth ID
export CLOUDNS_SUB_AUTH_ID=XXXXX
# Use this for a regular auth ID
#export CLOUDNS_AUTH_ID=XXXXX
export CLOUDNS_AUTH_PASSWORD="YYYYYYYYY"
Note: in coding anything that goes after the # is a comment and has no effect on the code.
In this case, I will use option 2, which is Authen_ID.
- You will need to change the directory to
root/.acme.sh - Use the cd command:
cd .acme.sh - Use the ls command to view the directory:
ls - Use Easy Editor command to edit the account.config: ee account.config
root@truenas[~]# cd .acme.sh
root@truenas[~/.acme.sh]# ls
account.conf		acme.sh.env		dnsapi
acme.sh			ca			http.header
acme.sh.csh		deploy			notify
root@truenas[~/.acme.sh]# ee account.conf- Add the below variables to the account.config
CLOUDNS_AUTH_ID=9402
CLOUDNS_AUTH_PASSWORD="Super$ecretP@ssw0rd"
- Press
ESCto exit. - Select
a) leave editor.

- Select
a) save changes

➡️ Step 3: Register an email account with the Let’s Encrypt Certificate of Authority.
- Register an email account using the below command:
./acme.sh --register-account --email youremail@happiness.love
root@truenas[~/.acme.sh]# ./acme.sh --register-account --email techsupport@sysadmin102.tech
[Tue May  9 20:31:22 PDT 2023] Registering account: https://acme.zerossl.com/v2/DV90
➡️ Step 4: DNS Validation and Install Let’s encrypt certificates on TrueNAS CORE Server.
- We will generate a wildcard certificate as it would work with any sub domain.
- Issue the certificate and wildcard certificate for sysadmin102.tech using the below command:
./acme.sh --issue --dns dns_cloudns -d sysadmin102.tech -d '*.sysadmin102.tech‘
- Output:
root@truenas[~/.acme.sh]# ./acme.sh --issue --dns dns_cloudns -d sysadmin102.tech -d '*.sysadmin102.tech'
[Tue May  9 21:12:45 PDT 2023] Using CA: https://acme.zerossl.com/v2/DV90
[Tue May  9 21:12:45 PDT 2023] Creating domain key
[Tue May  9 21:12:45 PDT 2023] The domain key is here: /root/.acme.sh/sysadmin102.tech/sysadmin102.tech.key
[Tue May  9 21:12:45 PDT 2023] Multi domain='DNS:sysadmin102.tech,DNS:*.sysadmin102.tech'
[Tue May  9 21:12:45 PDT 2023] Getting domain auth token for each domain
[Tue May  9 21:12:52 PDT 2023] Getting webroot for domain='sysadmin102.tech'
[Tue May  9 21:12:52 PDT 2023] Getting webroot for domain='*.sysadmin102.tech'
[Tue May  9 21:12:52 PDT 2023] Adding txt value: HZutKGuwSI3acyt_p56IfUrOeRF10ZYyvaZmXc-2h_c for domain:  _acme-challenge.sysadmin102.tech
[Tue May  9 21:12:52 PDT 2023] Using cloudns
[Tue May  9 21:12:53 PDT 2023] Adding the TXT record for _acme-challenge.sysadmin102.tech
[Tue May  9 21:12:54 PDT 2023] Added.
[Tue May  9 21:12:54 PDT 2023] The txt record is added: Success.
[Tue May  9 21:14:27 PDT 2023] Cert success.
/.../
-----BEGIN CERTIFICATE-----
MIIGgjCCBGqgAwIBAgIQddgNPaqKRd97PDDnTg+URDANBgkqhkiG9w0BAQwFADBL
/.../
-----END CERTIFICATE-----
[Tue May  9 21:14:27 PDT 2023] Your cert is in: /root/.acme.sh/sysadmin102.tech/sysadmin102.tech.cer
[Tue May  9 21:14:27 PDT 2023] Your cert key is in: /root/.acme.sh/sysadmin102.tech/sysadmin102.tech.key
[Tue May  9 21:14:27 PDT 2023] The intermediate CA cert is in: /root/.acme.sh/sysadmin102.tech/ca.cer
[Tue May  9 21:14:27 PDT 2023] And the full chain certs is there: /root/.acme.sh/sysadmin102.tech/fullchain.cer
➡️ Step 5: Generating the TrueNAS API Key and adding DEPLOY_TRUENAS_APIKEY environment variable to root/.acme.sh/account.config
➡️ Generate the TrueNAS API Key
- Select Setting (Gear icon) from the TrueNAS web GUI.
- Select API Keys

- Select Add to add a new API Key.
- Name your API Key.
- Select Add.

- Select COPY TO CLIPBOARD. (Keep it on a Sticky Note or Text file just in case 🙂
- Select CLOSE.

➡️ Add DEPLOY_TRUENAS_APIKEY environment variable to root/.acme.sh/account.config
- Resources from Offical wiki page : https://github.com/acmesh-official/acme.sh/wiki/deployhooks#25-deploy-the-cert-on-truenas-core-server
- Variables for DEPLOY_TRUENAS_APIKEY:
DEPLOY_TRUENAS_APIKEY="<API_KEY_GENERATED_IN_THE_WEB_UI>"    # Required
DEPLOY_TRUENAS_HOSTNAME="localhost"    # Optional, defaults to localhost
DEPLOY_TRUENAS_SCHEME="http" # Optional, defaults to http, set alternatively to https- Use the Easy Editor to edit the
account.configusing the commandee account.config. - Add the above variables to your
account.config. - Press
ESCto exit. - Select
a) leave editor. - Select
a) save changes
Output:
#LOG_FILE="/root/.acme.sh/acme.sh.log"
#LOG_LEVEL=1

#AUTO_UPGRADE="1"

#NO_TIMESTAMP=1

DEPLOY_TRUENAS_APIKEY="API_KEY"
DEPLOY_TRUENAS_HOSTNAME="truenas.sysadmin102.tech"
DEPLOY_TRUENAS_SCHEME="https"

ACCOUNT_EMAIL='techsupport@sysadmin102.com'
UPGRADE_HASH='hash'
SAVED_CLOUDNS_AUTH_ID='9402'
SAVED_CLOUDNS_SUB_AUTH_ID=''
SAVED_CLOUDNS_AUTH_PASSWORD='Super$ecretP@ssw0rd'
USER_PATH='/sbin:/bin:/usr/sbin:/usr/bin:/usr/local/sbin:/usr/local/bin:/root/bin'
➡️ Step 6: Deploy Let’s encrypt certificates on TrueNAS CORE Server.
Deploy the downloaded certificates using the below command:
./acme.sh --insecure --deploy -d sysadmin102.tech --deploy-hook truenas
Output:
root@truenas[~/.acme.sh]# ./acme.sh --insecure --deploy -d sysadmin102.tech --deploy-hook truenas
[Tue May  9 22:57:58 PDT 2023] Testing Connection TrueNAS
[Tue May  9 22:57:58 PDT 2023] TrueNAS system state: "READY".
[Tue May  9 22:57:58 PDT 2023] Getting current active certificate from TrueNAS
[Tue May  9 22:57:58 PDT 2023] Uploading new certificate to TrueNAS
[Tue May  9 22:57:59 PDT 2023] Fetching list of installed certificates
[Tue May  9 22:57:59 PDT 2023] Current activate certificate ID: 6
[Tue May  9 22:58:00 PDT 2023] Checking if WebDAV certificate is the same as the TrueNAS web UI
[Tue May  9 22:58:01 PDT 2023] WebDAV certificate is not configured or is not the same as TrueNAS web UI
[Tue May  9 22:58:01 PDT 2023] Checking if FTP certificate is the same as the TrueNAS web UI
[Tue May  9 22:58:01 PDT 2023] FTP certificate is not configured or is not the same as TrueNAS web UI
[Tue May  9 22:58:01 PDT 2023] Checking if S3 certificate is the same as the TrueNAS web UI
[Tue May  9 22:58:01 PDT 2023] S3 certificate is not configured or is not the same as TrueNAS web UI
[Tue May  9 22:58:01 PDT 2023] Deleting old certificate
[Tue May  9 22:58:01 PDT 2023] Reloading TrueNAS web UI
[Tue May  9 22:58:01 PDT 2023] Success
root@truenas[~/.acme.sh]#
➡️ Auto-renewal
The last step is to create a cron job to automate the renewal process.
From TrueNAS Dashboard > Tasks > Cron Jobs > Add
- Description:
Let's Encrypt Renewal - Command:
/root/.acme.sh/acme.sh --cron - Run as User:
root - Schedule:
Weekly - Save

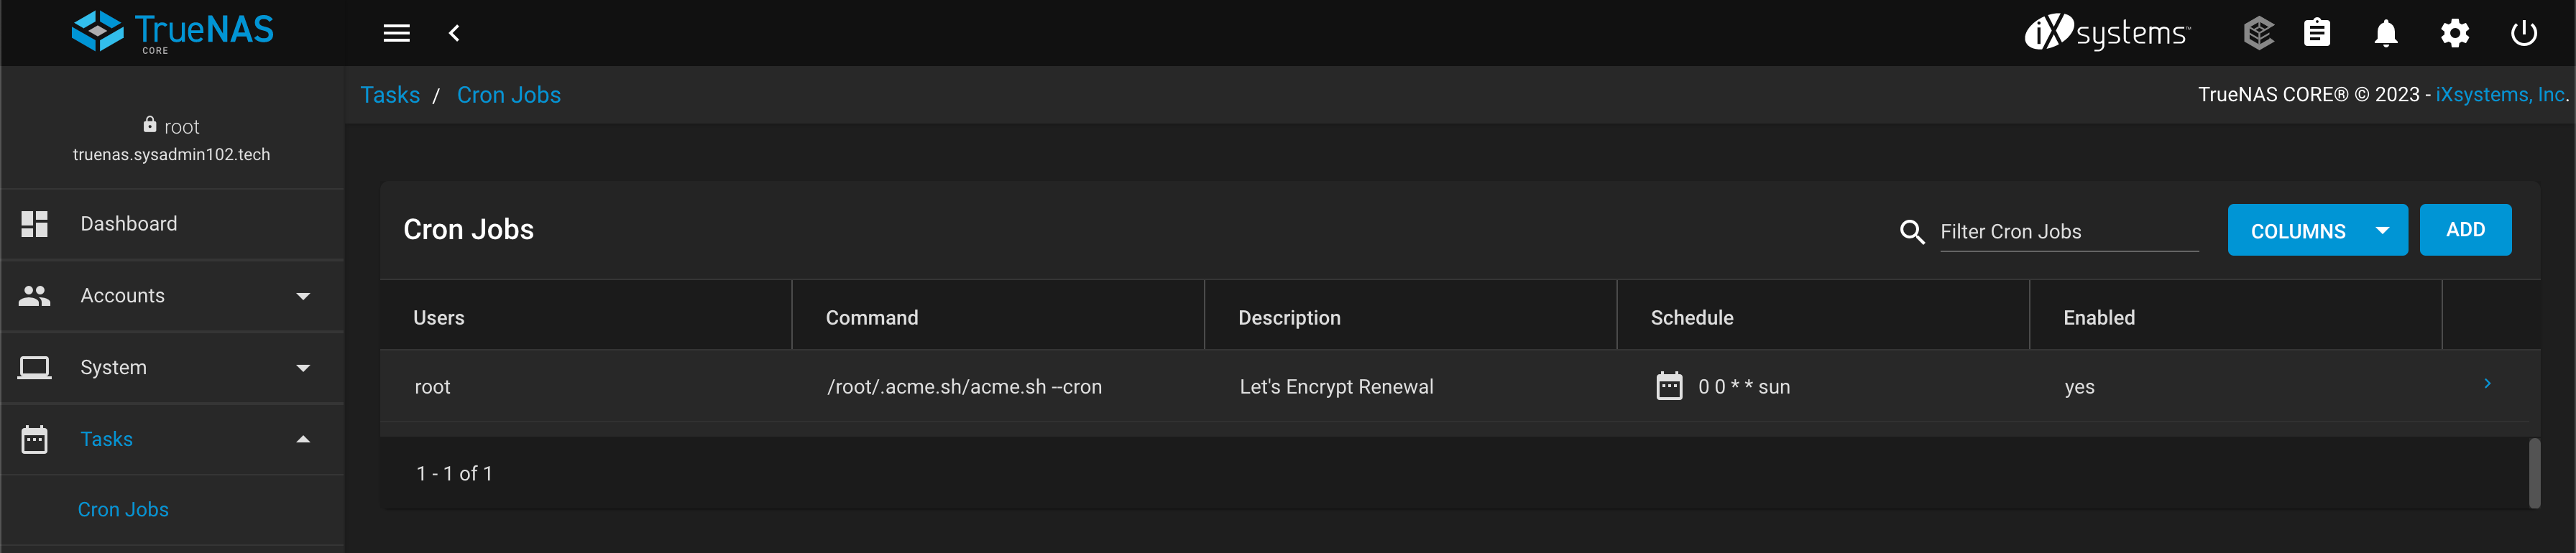
This cron job will run at 00:00 AM every Sunday and renew the certificate if it is within 30 days of expiration.
While a wildcard certificate will work with any subdomain, you can deploy this same certificate to your server in TrueNAS Jail such as Nextcloud.
root@truenas[~]# /root/.acme.sh/acme.sh --cron
[Wed May 10 00:47:07 PDT 2023] ===Starting cron===
[Wed May 10 00:47:07 PDT 2023] Renew: 'sysadmin102.tech'
[Wed May 10 00:47:07 PDT 2023] Renew to Le_API=https://acme.zerossl.com/v2/DV90
[Wed May 10 00:47:07 PDT 2023] Skip, Next renewal time is: 2023-07-09T06:20:34Z
[Wed May 10 00:47:07 PDT 2023] Add '--force' to force to renew.
[Wed May 10 00:47:07 PDT 2023] Skipped sysadmin102.tech
[Wed May 10 00:47:07 PDT 2023] ===End cron===
root@truenas[~]#
➡️ If you think this tutorial is helpful, please subscribe to my YouTube channel for more tutorials: https://www.youtube.com/@sysadmin102